Comprehensive Guide to Drywall Installation in Wisconsin
Introduction
Drywall installation is a crucial step in any construction or renovation project, providing structure and aesthetic appeal to interior spaces. Especially in Wisconsin, where the climate can present unique challenges, understanding the nuances of drywall installation is essential for homeowners and contractors alike. This comprehensive guide will delve into the drywall installation process, common materials, tools required, and tips for DIY enthusiasts, as well as when to hire professionals.
1. Understanding Drywall
1.1 What is Drywall?
Drywall, also known as gypsum board, wallboard, or plasterboard, is a panel made of gypsum plaster pressed between two thick sheets of paper. It's a popular material for constructing walls and ceilings owing to its ease of installation and finishing.
1.2 Types of Drywall
There are various types of drywall suited for different applications, including:
- Regular Drywall: The standard type, suitable for most interior walls and ceilings.
- Moisture-Resistant Drywall: Often referred to as a green board, this type is ideal for areas prone to humidity, such as bathrooms.
- Fire-Resistant Drywall: Designed to resist flames, this drywall is essential for fire-rated walls in commercial settings or between garages and living spaces.
- Soundproof Drywall: This type minimizes sound transmission, perfect for home theaters or shared walls in multi-family homes.
2. The Drywall Installation Process
2.1 Tools and Materials Needed
Before beginning any drywall installation project, it's crucial to gather the right tools and materials:
Tools:
- Drywall saw or utility knife
- T-square
- Drywall lift (optional for ceilings)
- Screw gun or drill
- Drywall tape (mesh or paper)
- Compound (joint compound)
- Sanding block or pole sander
- Safety gear (mask, goggles, gloves)
Materials:
- Drywall sheets
- Drywall screws
- Joint compound
- Corner beads (for outside corners)
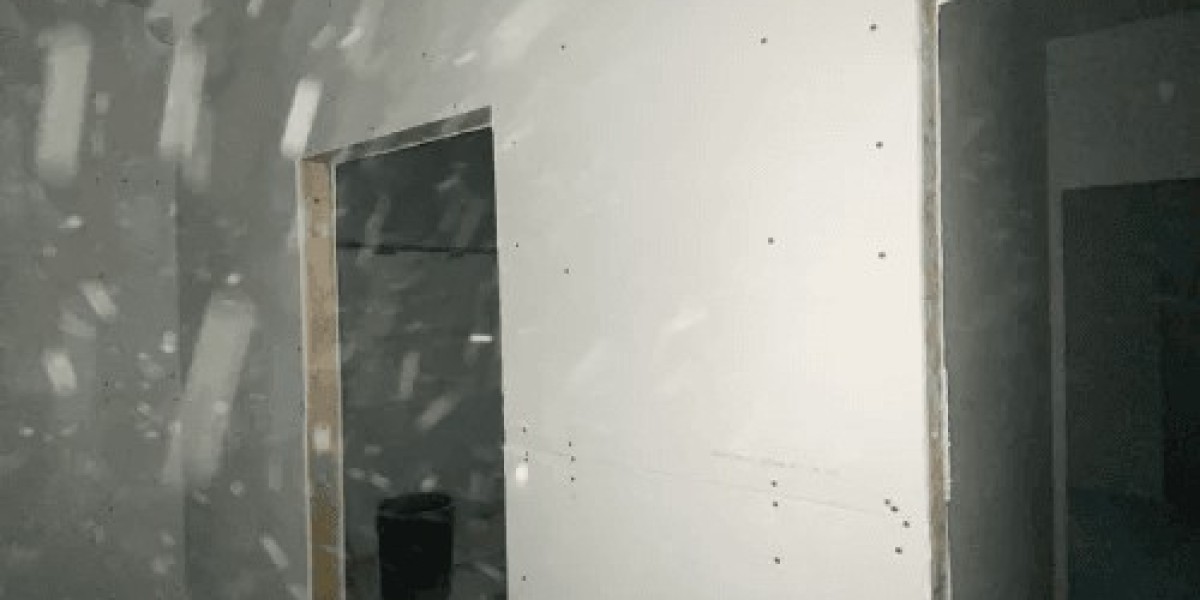
2.2 Step-by-Step Installation
Planning and Measurement: Begin by measuring the area to determine how many sheets of drywall you will need. Factor in doorways, windows, and other openings for accurate measurements.
Cutting the Drywall: Using a utility knife, score the drywall along the straight edge and snap it along the score line. Cut the paper backing to free the drywall.
Hanging the Sheets: Start from the top and work your way down. Use drywall screws spaced every 12 to 16 inches along the edges and 12 inches in the field (center).
Applying Joint Tape: After hanging the sheets, apply joint tape over the seams. Make sure you use the right type (paper or mesh) depending on your preference.
Taping and Mudding: Apply joint compound over the taped seams using a wide knife. Feather the edges so that the compound gradually thins out.
Sanding: Once the compound has dried, sand the surface using a sanding block or pole sander. Be sure to wear a mask to avoid inhaling dust.
Final Touches: Apply additional coats of joint compound as needed, sand between each coat, and finish by applying primer and paint.
3. Common Mistakes to Avoid
When installing drywall, several common pitfalls can lead to a subpar finish:
Poor Planning: Failing to plan can lead to inefficient material use or misalignment of drywall sheets.
Improper Fastening: Using the wrong size screws or improper spacing can weaken the wall structure.
Skipping the Joint Tape: Taping seams is essential for a smooth finish and structural integrity.
Over-Sanding: While it's crucial to achieve a smooth finish, over-sanding can damage the surface, causing low spots.
Ignoring Moisture Control: In damp areas, it’s vital to use moisture-resistant materials to prevent mold growth.
4. Working with Professionals
While many homeowners may be tempted to install drywall themselves, hiring professionals can lead to a better result.
4.1 When to Hire Professionals
- Complex Projects: For larger homes or commercial applications with intricate designs, professionals can often work faster and more efficiently.
- Time Constraints: If your project timeline is tight, hiring experts ensures the work is completed on schedule.
- Specialized Requirements: Some projects may require specific techniques or types of drywall, like acoustic tiles for soundproofing, best handled by experienced contractors.
4.2 Choosing the Right Contractor
When selecting a drywall contractor, consider the following:
- Experience: Look for contractors with a proven track record and positive reviews.
- Licensing and Insurance: Ensure they have the proper licenses and insurance to protect you from liability.
- Written Estimates: Obtain several estimates and ensure they outline the scope of work and materials used.
5. Drywall Cost Considerations in Wisconsin
The cost of drywall installation can vary significantly based on several factors:
Material Costs: Regular drywall typically costs between $10 to $15 per sheet. Specialty sheets, like moisture or fire-resistant drywall, can be more expensive.
Labor Costs: On average, labor costs in Wisconsin can range from $1.50 to $3.00 per square foot.
Additional Finishing: Texturing, painting, and additional finishing touches will also affect the total cost.
6. Environmental Considerations
As Wisconsin continues to focus on sustainable building practices, it's essential to consider eco-friendly drywall options.
6.1 Green Drywall
Environmentally friendly drywall options, made from recycled materials, contribute to sustainability and improve indoor air quality. Look for products certified by organizations like the Forest Stewardship Council (FSC).
6.2 Energy-Efficient Building
Investing in quality insulation, vapor barriers, and energy-efficient drywall can significantly improve energy performance and reduce heating and cooling costs in Wisconsin, where winters can be particularly harsh.
7. Conclusion
Drywall installation is a fundamental aspect of construction and renovation work in Wisconsin. By understanding the materials, tools, and techniques involved, homeowners can make informed decisions about whether to undertake a DIY project or hire professional help. Remember that investing in quality materials and skilled labor can provide long-lasting results, enhancing both the beauty and functionality of your space. With this guide in hand, you’re well-equipped to tackle your next drywall installation project with confidence.